Grampian 23 sailboat

8 - Head and Vee-berth

Home | As is, where is | Cleaned and scrubbed | Projects. | Breaker yard | 1-deck recore | 2-recore | 3-deck and inside | 4-interior | 5-interior | 6-interior | 7 - Interior | 8 - Forward | 9 - Forward | 10 - Head | 11 - painting | 12 - Deck | Mast and boom | Electrical | Musings | Suppliers | Boatyard | Tools, etc. | Misc. | Launch

Head Games and Vee berth strategies

091veeberth.jpg
VEE BERTH

17 April 2005
 
I've dry fitted the vee berth bulkhead so as to gain access to the space. This is where I plan to put the holding tank for the head. I'll re-use the through hull fittings, they are bronze and in good shape. The valves are another thing. As I will be cruising on the river for most of the time, I plan to use only the 3/4" inlet valve (new ball-cock) and will reinsert the 1 1/2" through hull and plug it off. I may just reuse the big gate valve after freeing it up and then plugging the top. A double shut feature, if you will. So, the question is how big a tank can I afford to fit? Rectangular or irregular shape? Decisions, decisions. 

092throughholes.jpg
HULL HOLES

From left to right - speedo sensor, (dirty circle) depth gauge transducer, 3/4" inlet hole, 1 1/2" outlet hole.
There's a square piece of starboard lying in the bottom and the shelf which supported the water tank is also visible. It is quite dirty because the transducer had been in a tube glassed to the hull and filled with mineral oil. The tube obviously developed a leak which left the mineral oil sloshing around in this area. UGH. I have to clean this before painting.

097throughhullsandvalves.jpg
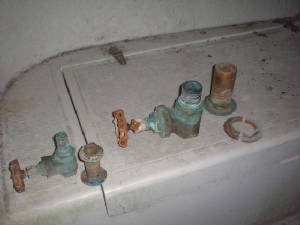
GATE VALVES AND THROUGH HULL FITTINGS

When the valves were in the boat they seemed destined for the scrap heap. Now, upon inspection, they are in pretty good condition and I will probably refurbish the big one.
The only way I could release the 1 1/2" through hull was by splitting the nut. That is what is visible to the right of the photo. I have already purchased a replacement.

1 May 2005
 
I spent the day making the support shelf for the water tank. I had to enlarge the hatch and ultimately make a new hatch-cover as the tank could not be shoehorned in any other way. Everything is in place, but not permanently. I will do this after I have all the tanks, the head and all associated plumbing pieces. I think there is too much possibility of stuff having to be shifted, moved or persuaded into place to fix anything right now. So, I've made more progress.

104forwardstorage.jpg
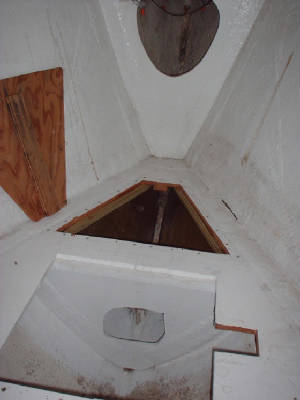
NEW HATCH IN VEE BERTH

The notch in the v-berth is gone. I had to enlarge the hatch after I made a shelf for the tank to rest on. I couldn't get the tank and fittings to fit so made the decision to just cut a rectangular hatch, which cleaned up the look of the berth.

108wastetankspace.jpg
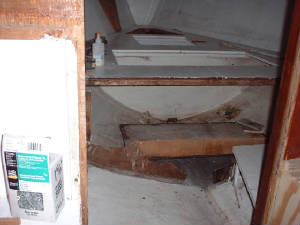
STORAGE FOR WASTE TANK

This was the original space for the nine gallon water tank. As I measured, I found I could fit a 20 gallon waste tank here and also get the water tank to fit into the space just forward of this tank space. So this will work well.