Grampian 23 sailboat

12 - Deck

Home | As is, where is | Cleaned and scrubbed | Projects. | Breaker yard | 1-deck recore | 2-recore | 3-deck and inside | 4-interior | 5-interior | 6-interior | 7 - Interior | 8 - Forward | 9 - Forward | 10 - Head | 11 - painting | 12 - Deck | Mast and boom | Electrical | Musings | Suppliers | Boatyard | Tools, etc. | Misc. | Launch

Deck and Cabin-top finishing. 

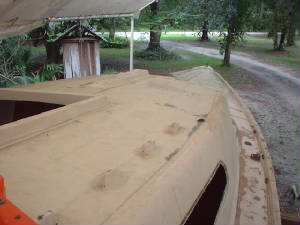
132cabintopwithbiaxlayer.jpg
LOOKING ACROSS CABIN TOWARD THE BOW.

I used a heavy biaxial cloth to cover the seams on the deck and cabin. It worked really great, the only problem is the amount of sanding I have to do on the seams of the cloth. Biax is one heavy-duty sucker. I like working with the cloth, $8.00 a yard and sixty two inches wide. It does suck up the epoxy, though. This will be a very waterproof deck. I still have to finish the side deck shown in the photo. I will also have to drill another hole for the water fill cover.
 
I'm also going to add a bit here about the windows and re-installation. This turned out to be one of the more frustrating parts of the re-do. I carefully researched the gasket material for the Grampian, as best as one can do without being there, via the Internet. I found a place in Toronto who had Grampian gasket material. Great. I ordered it ($3 a foot!) and the doublesided sticky butyl tape. It turned out only the butyl tape was used. The gasket was much too thick and was simply not the correct gasket for the G-23 windows. Live and learn. I used a clear butyl adhesive caulk to stick the plexi into the window frame, and will use a grey butyl caulk for the outer gasket material. Had I known this, I would have saved about $120.

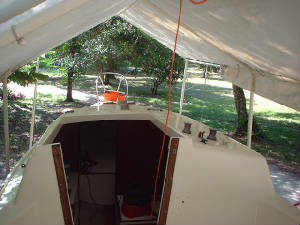
246hardware.jpg
CLEATS AND WINCHES ARE ON THE CABIN

The painting is pretty much finished. The coat with the non-skid compound went on, better than I anticipated. I took the time to tape off most of the cabin but should have gone the little extra step and cut the corners into the tape. Even though it is the same colour, there is a visible difference between the non-skid and the rest of the cabin-top and deck. The biggest gripe I had was with the 4200 product of 3M's. That is one hard sucker to use, and because of its chemistry, use it or lose it. It is a wonderful product for making things adhere to each other, but when pushing bolts through the goo and then trying to catch the nut, well, you can imagine the mess.

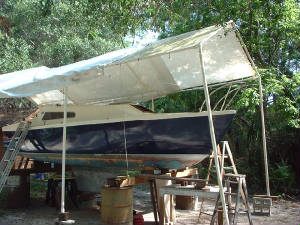
248frontview.jpg
PULPIT AND OTHER HARDWARE IS ON THE BOAT

As of this picture, all deck and cabin hardware has been installed. I just need to do a final tightening on the pulpit bolts, but that's a last little detail. I'm quite pleased with how the project is coming together. The finish on the paint is good and gets harder each day. I've done some work on the deck and no scuffing. I now have to place the stanchions and measure the length of wire to make up the lifelines. I have some 1/8" stainless rigging I am going to re-use.

I have re-installed the aluminum rubbing strips which go far in helping smooth out the boat's appearance. I used a tube of 3M 4200 which worked very well. But it has to be used fairly quickly once the tube is opened. I tried to organise as many jobs as possible that needed 4200's waterproofing. The main hatch went on along with the rubrail.